Installation of EDCenter Server
EDCenter provides automatically updated Docker images within the Docker Hub organization. It is possible to always use the latest stable tag or use another service that takes care of updating Docker images.
EDCenter Image on DockerHub: ateso/edcenter-single
This reference setup guides users through the setup based on docker-compose, but the installation of docker-compose is outside the scope of this documentation. To install docker-compose yourself, follow the official installation instructions.
System requirements:
- You need a server infrastructure on which you will deploy the EDCenter image. Below we describe how to set up EDCenter on Docker or Kubernetes.
- The EDCenter image contains only the EDCenter Runtime without database. For this reason, the MySQL database server must be operated outside the container and access must be configured.
- EDCenter sends notifications by e-mail. Access to your outgoing mail server must be configured accordingly.
- If SSO login via Microsoft Entra is desired, this must be set up and configured in advance.
User manuals
- Overall Quick Guide
- DocSystems / DocSoft
- EDCenter User Guide
Configuration via Environment
This is a cheat sheet for the EDCenter image configuration using environment variables. It contains the settings that can be configured as well as their default values.
| Environment variable | Default value | Description |
|---|---|---|
| 1. MySQL Server | ||
| EDC_MYSQL_HOST | 'db' | URL to the SQL host server |
| EDC_MYSQL_PORT | 3306 | SQL host port |
| EDC_MYSQL_USER | 'edc_production' | Mysql username with access to below defined database |
| EDC_MYSQL_PW | 'root' | Mysql user password |
| EDC_MYSQL_DB | 'sql_root' | Name of existing database |
| 2. SMTP Email Server | ||
| EDC_SMTP_HOST | - | URL to SMTP host server |
| EDC_SMTP_PORT | - | Port (mostly: 25, 465 or 587) |
| EDC_SMTP_USER | - | Username |
| EDC_SMTP_PASS | - | Password |
| EDC_SMTP_ENCRYPTION | - | Encryption type (Possible values: empty or 'tls') |
| EDC_SMTP_FROM_NAME | 'Engine Diagnostic Center' | Sender name |
| EDC_SMTP_FROM_EMAIL | - | Sender email |
| 3. MS Entra SSO | ||
| EDC_ENTRA_CLIENTID | - | |
| EDC_ENTRA_AUTHORITY | - | |
| EDC_ENTRA_REDIRECTURI | - | |
| EDC_ENTRA_BASECOMID | - | |
| EDC_ENTRA_FROMBASEDLOGIN | true | Boolean: Control whether frombased login should be offered or not |
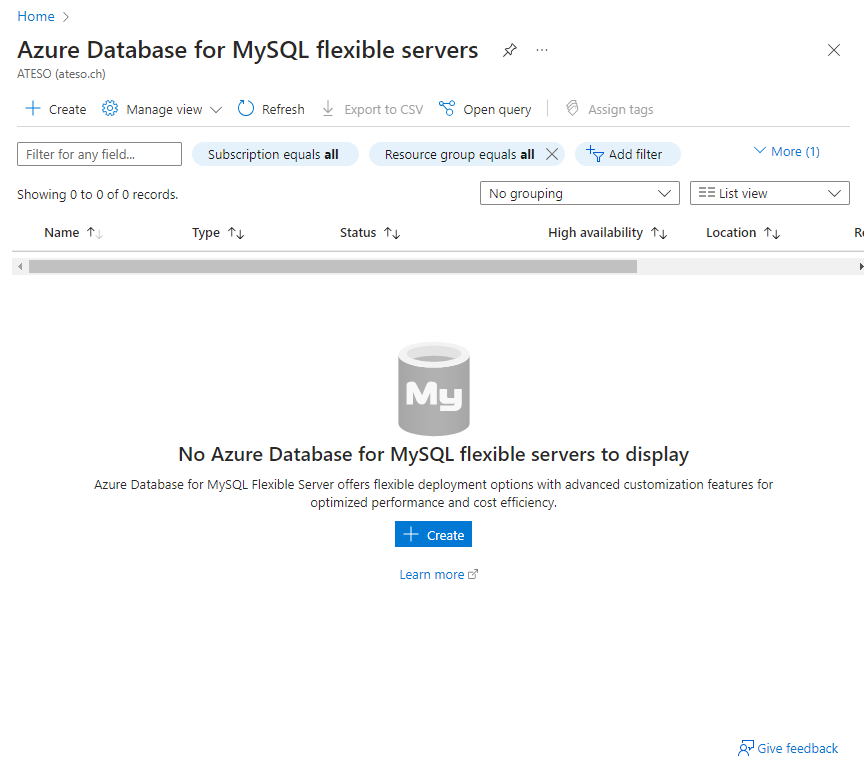
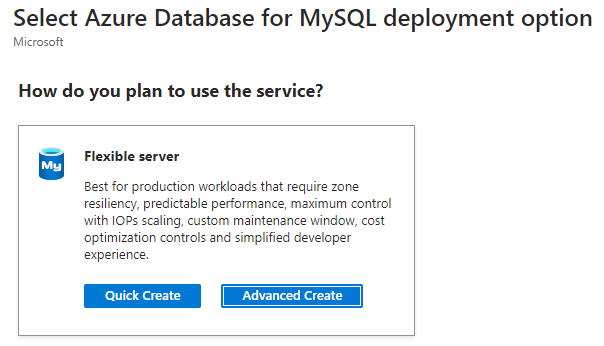
Configure MySQL Server
- Set up a MySQL flexible server and use the version 5.7.
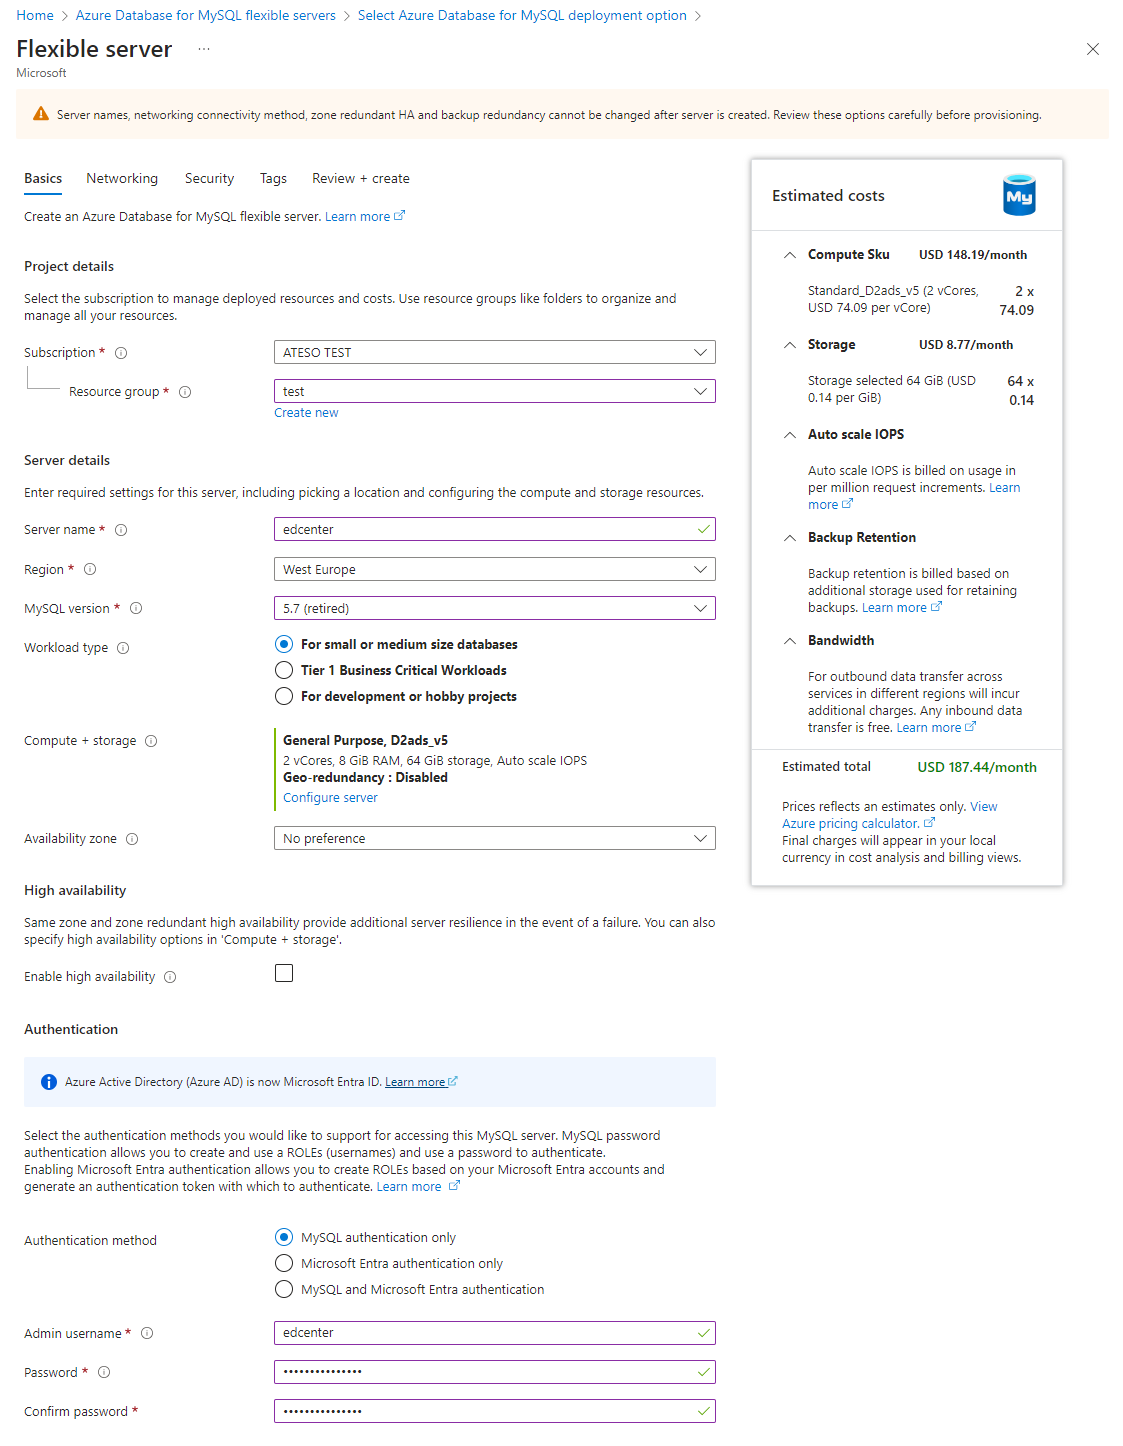
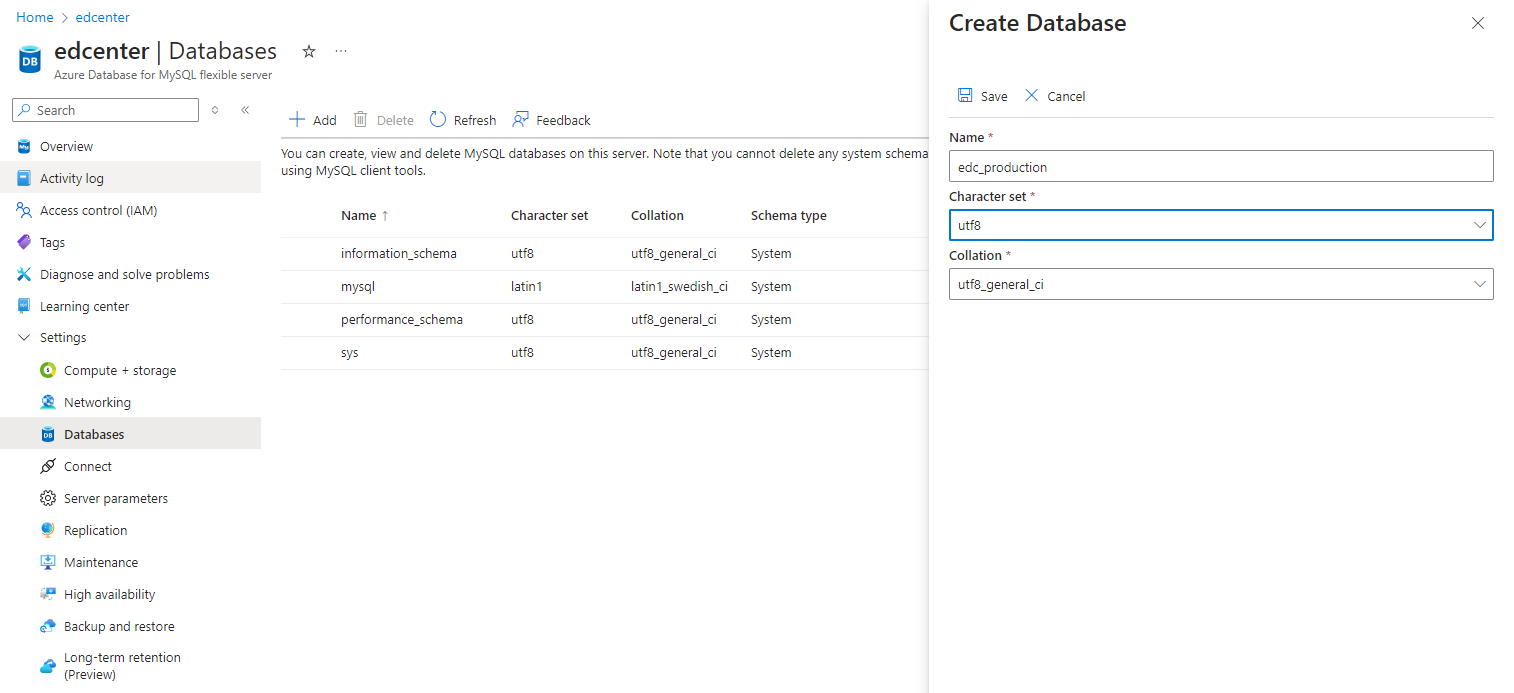
- Manually create a new database with the name “edc_production”.
- Create a user with full authorization specifically for the database. Grant all privileges for the database.
- The user must be configured using "mysql_native_password" identification mode.


Configure SMTP Server
Configure MS Entra SSO
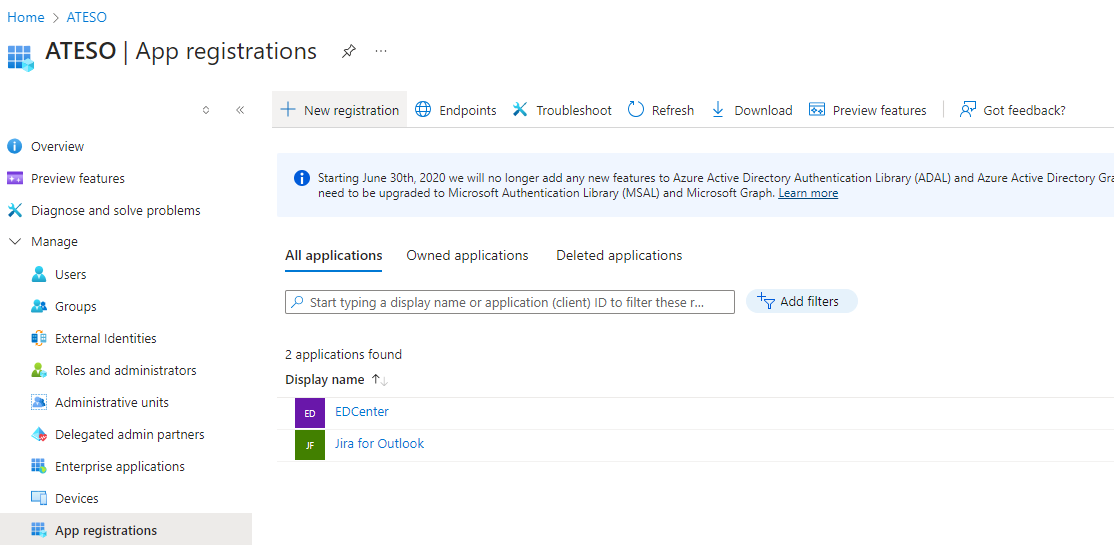
- Login to your corporate Azure portal
- Navigate to MS Entra -> App registrations
- Click on new registration
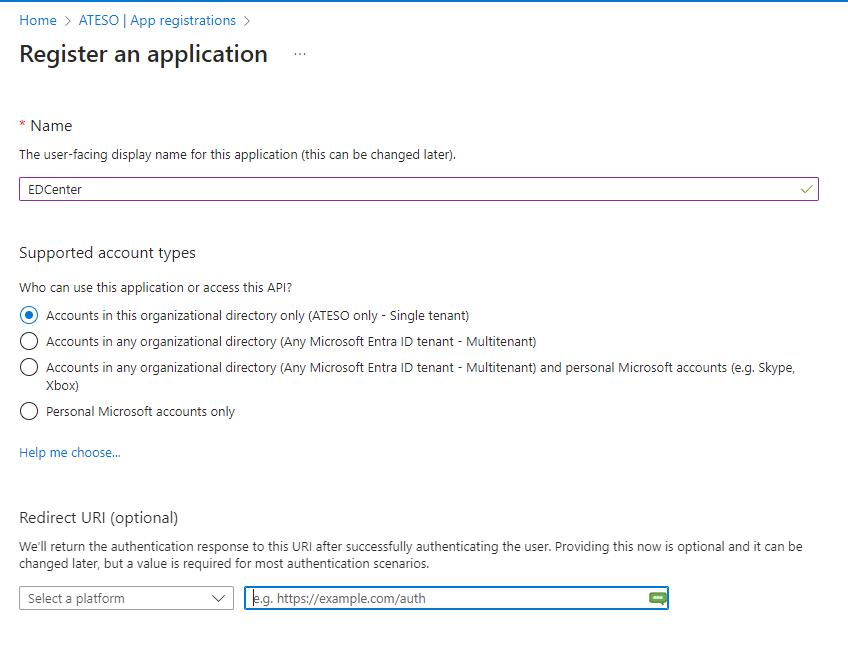
- Enter a name “EDCenter”, select the supported account types and define the redirection URI (public domain) under
which you want to make the EDCenter accessible.
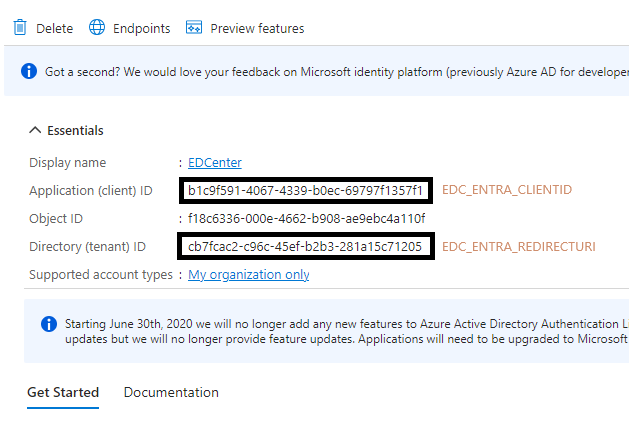
- You will then receive the details from MS for the env configuration of MS Entra in EDCenter:
- EDC_ENTRA_CLIENTID: b1c9f591-4067-4339-b0ec-69797f1357f1
- EDC_ENTRA_AUTHORITY: https://login.microsoftonline.com/cb7fcac2-c96c-45ef-b2b3-281a15c71205
- EDC_ENTRA_REDIRECTURI: http://localhost
- EDC_ENTRA_BASECOMID: 20 (Your company ID in edcenter)
- EDC_ENTRA_FROMBASEDLOGIN: true|false (Control whether frombased login should be offered or not)
- Enter a name “EDCenter”, select the supported account types and define the redirection URI (public domain) under
which you want to make the EDCenter accessible.


Install with Docker
name: edcenter
services:
  prod:
    container_name: edcenter
    image: ateso/edcenter-single:latest
    ports:
      - "80:80"
    environment:
      # SQL
      EDC_MYSQL_HOST: db
      EDC_MYSQL_USER: root
      EDC_MYSQL_PW:
      EDC_MYSQL_DB: edc_production
      # SMTP
      EDC_SMTP_HOST: mysql_prod
      EDC_SMTP_PORT:
      EDC_SMTP_USER:
      EDC_SMTP_PASS:
      EDC_SMTP_ENCRYPTION:
      EDC_SMTP_FROM_NAME:
      EDC_SMTP_FROM_EMAIL:
      # MS Entra
      EDC_ENTRA_CLIENTID:
      EDC_ENTRA_AUTHORITY:
      EDC_ENTRA_REDIRECTURI:
      EDC_ENTRA_BASECOMID:
Install with Kubernetes
EDCenter can be set up completely in Azure together with the KeyVault using this script. If this is to be translated into a different architectural language, this is up to you.
# AKS Settings
export AKS_NAMESPACE='edcenter'
export AKS_SERVICE_PROVIDER='edcenter-keyvault-provider'
export AKS_SERVICE_ACCOUNT='edcenter-service-identity-sa'
export AKS_DEPLOYMENT_NAME='edcenter-deployment'
export AKS_SERVICE='edcenter-service'

# Keyvaul AKS Settings
export SUBSCRIPTION_ID='c48b68ad-eb2b-4400-972a-f3788e2c16d2'
export LOCATION='centralus'
export RESOURCE_GROUP='aks_group'
export UAMI='edcenter-keyvault-aks-cluster'
export KEYVAULT_NAME='edcenter-keyvault'
export CLUSTER_NAME='aks'

# Pre (create keyvault)
echo 'PRE - create keyvault'
# Create keyvault with RBAC enabled
az keyvault create --name $KEYVAULT_NAME --resource-group $RESOURCE_GROUP --location centralus --enable-rbac-authorizatio
# Create a secret into an existing Key Vault
az keyvault secret set --vault-name $KEYVAULT_NAME --name "EDCMYSQLHOST" --value "edcenter-server.mysql.database.azure.com"
az keyvault secret set --vault-name $KEYVAULT_NAME --name "EDCMYSQLUSER" --value ""
az keyvault secret set --vault-name $KEYVAULT_NAME --name "EDCMYSQLPASS" --value ""
az keyvault secret set --vault-name $KEYVAULT_NAME --name "EDCSMTPHOST" --value "lx41.hoststar.hosting"
az keyvault secret set --vault-name $KEYVAULT_NAME --name "EDCSMTPUSER" --value "edc.noreply@fuchstechnology.com"
az keyvault secret set --vault-name $KEYVAULT_NAME --name "EDCSMTPPASS" --value ""
az keyvault secret set --vault-name $KEYVAULT_NAME --name "EDCSMTPPORT" --value "587"
az keyvault secret set --vault-name $KEYVAULT_NAME --name "EDCSMTPFROMEMAIL" --value "edc.noreply@fuchstechnology.com"
az keyvault secret set --vault-name $KEYVAULT_NAME --name "EDCSMTPFROMNAME" --value "Engine Diagnostic Center"

echo '1 - Account Settings'
az account set --subscription $SUBSCRIPTION_ID
az aks get-credentials --resource-group $RESOURCE_GROUP --name $CLUSTER_NAME --overwrite-existing
echo '2 - Create managed identity'
az identity create --name $UAMI --resource-group $RESOURCE_GROUP
echo '3 - Get IDs'
export USER_ASSIGNED_CLIENT_ID="$(az identity show --resource-group $RESOURCE_GROUP --name $UAMI --query 'clientId' -o tsv)"
export IDENTITY_TENANT=$(az aks show --name $CLUSTER_NAME --resource-group $RESOURCE_GROUP --query identity.tenantId -o tsv)
export KEYVAULT_SCOPE=$(az keyvault show --name $KEYVAULT_NAME --query id -o tsv)

# Example command for key vault with RBAC enabled using `key` type
echo '4 - RBAC role assigment'
az role assignment create --role "Key Vault Administrator" --assignee $USER_ASSIGNED_CLIENT_ID --scope $KEYVAULT_SCOPE

# Get the AKS cluster OIDC Issuer URL using the az aks show command.
echo '5 - Define OIDC user'
export AKS_OIDC_ISSUER="$(az aks show --resource-group $RESOURCE_GROUP --name $CLUSTER_NAME --query "oidcIssuerProfile.issuerUrl" -o tsv)"
echo $AKS_OIDC_ISSUER

echo '6 - namespace'
cat << EOF | kubectl apply -f -
apiVersion: v1
kind: Namespace
metadata:
  name: ${AKS_NAMESPACE}
  labels:
    name: ${AKS_NAMESPACE}
EOF

echo '7 - Add service account'
#Establish a federated identity credential between the Microsoft Entra application, service account issuer, and subject
cat << EOF | kubectl apply -f -
apiVersion: v1
kind: ServiceAccount
metadata:
  annotations:
    azure.workload.identity/client-id: ${USER_ASSIGNED_CLIENT_ID}
  name: ${AKS_SERVICE_ACCOUNT}
  namespace: ${AKS_NAMESPACE}
EOF

echo '8 - Create federated identity'
#Create the federated identity credential between the managed identity, service account issuer, and subject
export FEDERATED_IDENTITY_NAME="aksfederatedidentity" # can be changed as needed
az identity federated-credential create --name $FEDERATED_IDENTITY_NAME --identity-name $UAMI --resource-group $RESOURCE_GROUP --issuer ${AKS_OIDC_ISSUER} --subject system:serviceaccount:${AKS_NAMESPACE}:${AKS_SERVICE_ACCOUNT}

echo '9 - Add secret provider class'
#Deploy a SecretProviderClass using the kubectl apply command and the following YAML script.
cat << EOF | kubectl apply -f -
# This is a SecretProviderClass example using workload identity to access your key vault
apiVersion: secrets-store.csi.x-k8s.io/v1
kind: SecretProviderClass
metadata:
  name: ${AKS_SERVICE_PROVIDER}
  namespace: ${AKS_NAMESPACE}
spec:
  provider: azure
  parameters:
    usePodIdentity: "false"
    clientID: "${USER_ASSIGNED_CLIENT_ID}" # Setting this to use workload identity
    keyvaultName: ${KEYVAULT_NAME}       # Set to the name of your key vault
    cloudName: ""                         # [OPTIONAL for Azure] if not provided, the Azure environment defaults to AzurePublicCloud
    objects:  |
      array:
        - |
          objectName: EDCMYSQLHOST
          objectType: secret
        - |
          objectName: EDCMYSQLUSER
          objectType: secret
        - |
          objectName: EDCMYSQLPASS
          objectType: secret
        - |
          objectName: EDCSMTPHOST
          objectType: secret
        - |
          objectName: EDCSMTPPORT
          objectType: secret
        - |
          objectName: EDCSMTPUSER
          objectType: secret
        - |
          objectName: EDCSMTPPASS
          objectType: secret
        - |
          objectName: EDCSMTPFROMEMAIL
          objectType: secret
        - |
          objectName: EDCSMTPFROMNAME
          objectType: secret

    tenantId: "${IDENTITY_TENANT}"        # The tenant ID of the key vault
  secretObjects:
    - secretName: edcenter-secret
      type: Opaque
      data:
        - key: EDCMYSQLHOST
          objectName: EDCMYSQLHOST
        - key: EDCMYSQLUSER
          objectName: EDCMYSQLUSER
        - key: EDCMYSQLPASS
          objectName: EDCMYSQLPASS
        - key: EDCSMTPHOST
          objectName: EDCSMTPHOST
        - key: EDCSMTPPORT
          objectName: EDCSMTPPORT
        - key: EDCSMTPUSER
          objectName: EDCSMTPUSER
        - key: EDCSMTPPASS
          objectName: EDCSMTPPASS
        - key: EDCSMTPFROMEMAIL
          objectName: EDCSMTPFROMEMAIL
        - key: EDCSMTPFROMNAME
          objectName: EDCSMTPFROMNAME
EOF

echo 'POST - do deployment'
cat << EOF | kubectl apply -f -
apiVersion: apps/v1
kind: Deployment
metadata:
  name: ${AKS_DEPLOYMENT_NAME}
  namespace: ${AKS_NAMESPACE}
  labels:
    app: ${AKS_NAMESPACE}
spec:
  replicas: 3
  selector:
    matchLabels:
      app: ${AKS_NAMESPACE}
  template:
    metadata:
      labels:
        app: ${AKS_NAMESPACE}
    spec:
      serviceAccountName: "${AKS_SERVICE_ACCOUNT}"
      containers:
        - name: ${AKS_NAMESPACE}
          image: ateso.azurecr.io/edcenter-single:latest
          ports:
            - containerPort: 80
          volumeMounts:
            - name: secrets-store01-inline
              mountPath: "/mnt/secrets-store"
              readOnly: true
          env:
            - name: EDC_MYSQL_HOST
              valueFrom:
                secretKeyRef:
                  name: edcenter-secret
                  key: EDCMYSQLHOST
            - name: EDC_MYSQL_DB
              value: "edc_production"
            - name: EDC_MYSQL_USER
              valueFrom:
                secretKeyRef:
                  name: edcenter-secret
                  key: EDCMYSQLUSER
            - name: EDC_MYSQL_PW
              valueFrom:
                secretKeyRef:
                  name: edcenter-secret
                  key: EDCMYSQLPASS
            - name: EDC_SMTP_HOST
              valueFrom:
                secretKeyRef:
                  name: edcenter-secret
                  key: EDCSMTPHOST
            - name: EDC_SMTP_PORT
              valueFrom:
                secretKeyRef:
                  name: edcenter-secret
                  key: EDCSMTPPORT
            - name: EDC_SMTP_USER
              valueFrom:
                secretKeyRef:
                  name: edcenter-secret
                  key: EDCSMTPUSER
            - name: EDC_SMTP_PASS
              valueFrom:
                secretKeyRef:
                  name: edcenter-secret
                  key: EDCSMTPPASS
            - name: EDC_SMTP_FROM_EMAIL
              valueFrom:
                secretKeyRef:
                  name: edcenter-secret
                  key: EDCSMTPFROMEMAIL
            - name: EDC_SMTP_FROM_NAME
              valueFrom:
                secretKeyRef:
                  name: edcenter-secret
                  key: EDCSMTPFROMNAME
            - name: EDC_ENTRA_CLIENTID
              value: "3b6a5214-c98e-46b6-bf37-10261473406d"
            - name: EDC_ENTRA_AUTHORITY
              value: "https://login.microsoftonline.com/cb7fcac2-c96c-45ef-b2b3-281a15c71205"
            - name: EDC_ENTRA_REDIRECTURI
              value: "http://52.230.147.82"
            - name: EDC_ENTRA_BASECOMID
              value: "20"
      volumes:
        - name: secrets-store01-inline
          csi:
            driver: secrets-store.csi.k8s.io
            readOnly: true
            volumeAttributes:
              secretProviderClass: ${AKS_SERVICE_PROVIDER}
EOF

echo 'POST - do service'
cat << EOF | kubectl apply -f -
apiVersion: v1
kind: Service
metadata:
  name: ${AKS_SERVICE}
  namespace: ${AKS_NAMESPACE}
spec:
  selector:
    app: ${AKS_NAMESPACE}
  type: LoadBalancer
  ports:
    - protocol: TCP
      port: 80
      targetPort: 80
EOF
EDCenter configuration after successful start
The EDCenter master data must then be entered into the database in order to start the system. For this purpose, we have provided master data records that can be executed using a script within the container.
-
Access the container you have deployed in terminal mode.
-
Execute the following command in the terminal:
sh /home/storage/scripts/download.shThe script requests the file name and a token. You will receive this information from us.
- Filename: sent by mail
- Token: sent by mail
-
After successfully downloading and unpacking the master data file, you must temporarily activate the following global variable on your MySQL server to ensure the master data import. To do this, log in to your MySQL server and execute the following SQL command with admin/root rights. (If you are using version 5.7 of MySQL, then you do not need this step)
SET GLOBAL log_bin_trust_function_creators = 1; -
You can then import the master data:
sh masterdata/0_INIT.shThe script asks for SQL host, database, username and password to perform the import on your database. If already configured, the script pulls the data from the environment variables
Reconfigure host url in DocSoft
EDCenter can be operated as a SAAS or onprem solution. Depending on the variant, the host url of the EDCenter target server must be changed in DocSoft so that the measurement data is sent to the correct EDCenter instance.
The link to the EDCenter SAAS, which is operated by Internationtal Technology and is stored as the default value, is as follows:
Default host url (SAAS): https://edc.int-tec.com/docsoft/
-
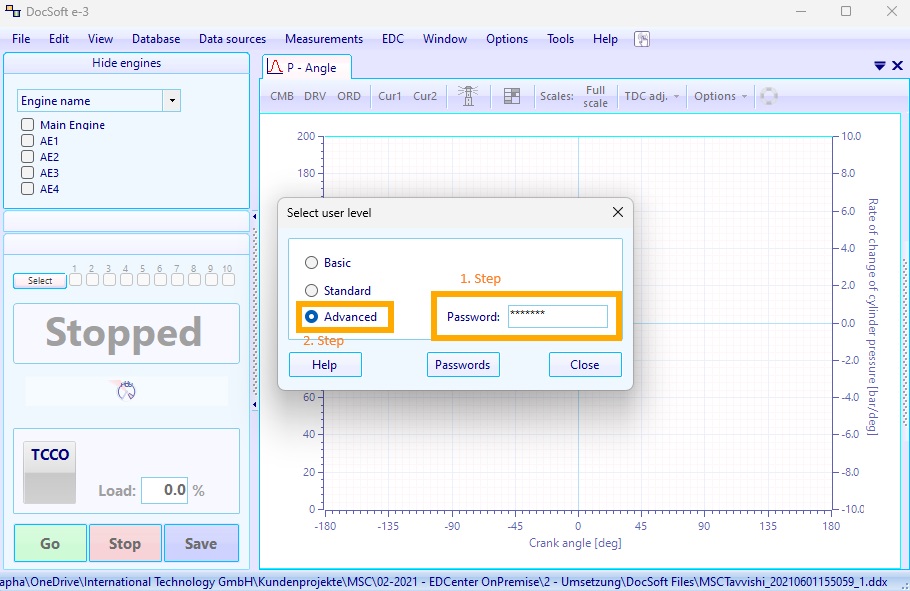
Open DocSoft on the DocSystem tablet (DocPad, DocHub, ...) and navigate to:
Options -> User level...

-
In the "Select user level" dialog enter the password "int-tec" and select "Advanced"
-
Again navigate to:
Options -> EDC...

-
Enter the your prefered host url in to the text input "Host:"
- Default host url (SAAS): https://edc.int-tec.com/docsoft/
- Onprem host url: https//xxx/docsoft/

-
Test your EDCenter connection using the actions available under:
EDC -> Context menu (Send data.., Import vessel.., Synchronize scalars)
Test using Synchronize scalars


